Fit a good pair of car speakers into an untreated door and you will hear an improvement. Fit the same speakers into a door that has been damped and sealed and you will hear a considerably bigger one, usually for less money than the next grade of speaker would have cost. That is not a sales line: it is measurable, and we take before-and-after sweeps to show it.
What the door is doing wrong
Three separate problems, all of them mechanical:
- The outer skin resonates. A large, thin, unsupported steel panel rings when the speaker pushes air at it. That ringing arrives at your ear slightly after the music and smears the bass.
- The inner skin leaks. It is full of access holes. Sound from the back of the cone comes straight through them, meets the sound from the front, and cancels it. This is why a door speaker with no treatment loses so much mid-bass.
- The door card buzzes. Clips, wiring, the loudspeaker grille and the window mechanism all rattle at specific frequencies, and they are usually bass frequencies.
Damping addresses the first, sealing the second, decoupling the third. They are different jobs and need different materials.
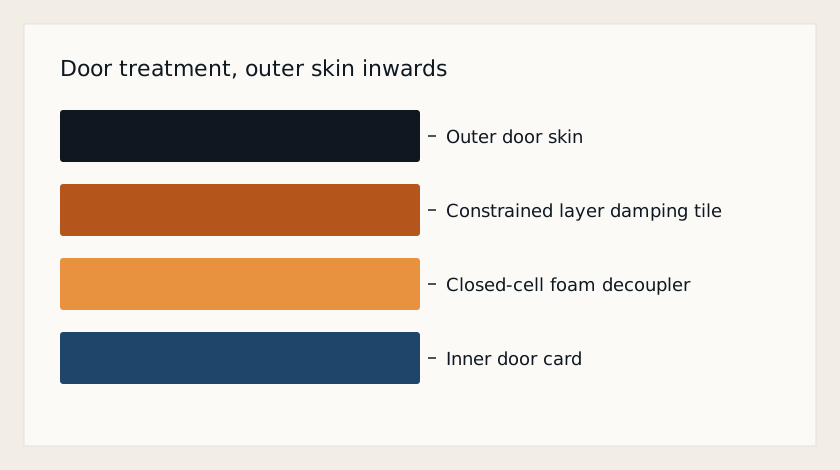
The three layers and what each does
1. Constrained layer damping (CLD) tiles
A sheet of butyl rubber with an aluminium foil facing. When the panel tries to flex, the butyl is sheared between the steel and the foil and turns that movement into a tiny amount of heat. It does not block sound; it stops the panel ringing. Applied to the outer skin, through the access holes, using a roller so it bonds properly.
Avoid the cheap asphalt-based sheets sold for building work. They smell in summer, they sag off vertical panels once the car has sat in the sun, and their damping performance at car temperatures is poor.
2. Closed-cell foam
Roughly 6–10 mm of closed-cell foam does two jobs: it decouples the door card from the inner skin so the two cannot buzz against each other, and it absorbs some of the reflected sound behind the speaker. Applied to the inner skin and to the back of the door card where it contacts metal.
3. Sealing the inner skin
This is the step that produces the biggest measurable change and the one most often skipped. The access holes in the inner skin are covered with CLD tiles or aluminium sheet, so the door becomes a closed volume behind the speaker. Leave the drain holes at the bottom clear — always — and keep or replace the vapour barrier so water still runs where the manufacturer intended.
The single most valuable 20 minutes
If you only do one thing, seal the inner skin around the speaker. Even a well-cut ring of damping material covering the holes nearest the driver is typically worth 3 dB in the 60–100 Hz band. That is the same gain you would get from doubling amplifier power.
How much coverage you actually need
You do not need to cover the whole panel, and a fully covered door is mostly wasted material and weight. For CLD on the outer skin, about 25 to 30 per cent coverage captures nearly all of the available benefit, provided the tiles are placed in the centre of each unsupported panel section where flexing is greatest.
The test is simple and works without instruments: tap the panel with a knuckle. Untreated, it rings. Add a tile in the middle of that section and tap again — when the ring becomes a dull thud, that section is done. Move to the next.
Coverage on the inner skin is different: there you are sealing, so the holes need to be closed completely rather than partially damped.
| Treatment level | Material per door | Added weight | Typical mid-bass gain |
|---|---|---|---|
| Seal the inner skin only | ~0.6 m² | ~1.8 kg | 2–3 dB |
| Outer damping plus sealed inner | ~1.2 m² | ~4 kg | 3–5 dB |
| Full treatment with foam and card decoupling | ~1.8 m² | ~6 kg | 4–6 dB, plus less road noise |
The order we work in
- Door card off, wiring unplugged and labelled, vapour barrier peeled back carefully so it can be reused.
- Clean the steel with panel wipe. Butyl will not bond to the factory wax film.
- CLD tiles on the outer skin through the access holes, rolled down firmly. Keep clear of the window channel and the regulator's travel.
- Close the inner skin access holes, leaving drains and any service points usable.
- Foam on the inner skin and on the back of the door card at every contact point.
- Speaker adaptor ring fitted and sealed to the metal with closed-cell tape.
- Vapour barrier replaced or rebuilt, door card refitted with new clips, window cycled fully to check nothing fouls.
Common mistakes
- Blocking the drain holes. The fastest route to a door full of water and a failed speaker eighteen months later.
- Covering the whole outer skin. Diminishing returns after roughly a third, and you are carrying the weight for nothing.
- Using open-cell foam. It absorbs water and holds it against the metal. Closed-cell only, in a door.
- Trapping the window regulator. Always cycle the window fully before the card goes back on. Finding a fouled mechanism afterwards means taking it all apart again.
- Skipping the panel wipe. Butyl on a waxy panel peels away within a summer.
What to expect afterwards
Bass from the door speakers gains body and stops sounding hollow. Road noise drops a little, though damping is not primarily an insulation job. Door closing sound changes noticeably — a solid thunk instead of a tinny slam — which is the usual first comment we get on handover.
What it does not do is add low bass. Nothing below about 50 Hz is going to come from a door panel regardless of treatment; that is a job for a subwoofer. Damping makes the bass you do have from the doors clean and tuneful, which in turn lets a subwoofer blend in properly rather than sounding like a separate box in the boot.
We treat two front doors in about half a day, or all four in a full day. If you would rather do it yourself, that is genuinely fine — ring the bay and we will tell you what to buy and where to put it.